テキストの表示と書式設定
テキストの表示(ax.text, plt.text)
Axes.text() を使って Axes にテキスト を表示できます。
Axes.text(x, y, s, fontdict=None, withdash=False, **kwargs)
必須引数は x, y, s で、それぞれ x 座標、y 座標、表示するテキスト (文字列) です。**kwargs で fontfamily や size, color などを設定できます。
MATLABスタイルでは、plt.text() でテキストを表示できます。
matplotlib.pyplot.text(x, y, s, fontdict=None, **kwargs)
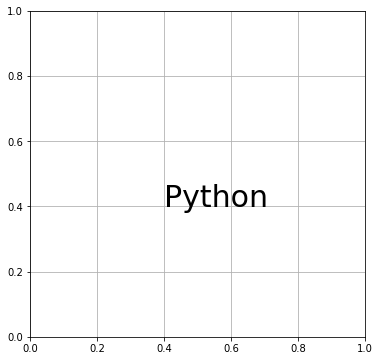
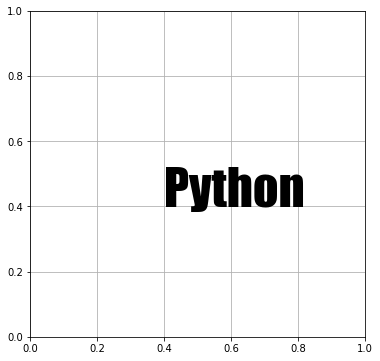
この記事では、Axes.text() で説明します。(0.4, 0.4) の位置に “Python” をサイズ 30 で表示させてみます。
# MATPLOTLIB_TEXT

# In[1]

# Matplotlibをインポート
import matplotlib.pyplot as plt

# FigureとAxes
fig, ax = plt.subplots(figsize=(6, 6))

# 目盛線を描画
ax.grid()

# 座標(0.4, 0.4)にテキストを表示する
ax.text(0.4, 0.4, "Python", size=30)

plt.show()
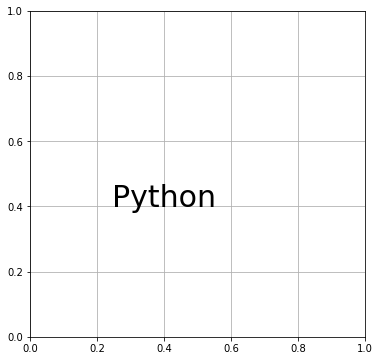
デフォルトでは指定座標にテキストの左下隅を合わせるように設定されていますが、horizontalalignment や verticalalignment で設定を変更できます。それぞれ、水平方向と垂直方向の位置を調整します。たとえば、指定座標にテキストの中央下を合わせる場合は horizontalalignment に “center” を指定します。
# In[2]

# テキストを削除
del fig.gca().texts[0]

# (0.4,0.4)の位置にテキストを表示する
# テキストの中央下を指定座標に合わせる
ax.text(0.4, 0.4, "Python", size=30, horizontalalignment="center")

# Figureを再表示
fig
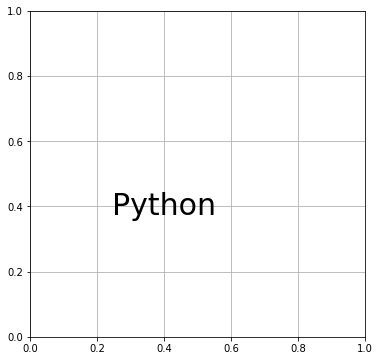
指定座標にテキストの中央を合わせたいときは、horizontalalignment と verticalalignment の両方に “center” を指定します。
# In[3]

del fig.gca().texts[0]

# (0.4,0.4)の位置にテキストを表示する
# テキスト中央を指定座標に合わせる
ax.text(0.4, 0.4, "Python", size=30,
        horizontalalignment="center",
        verticalalignment="center")

fig
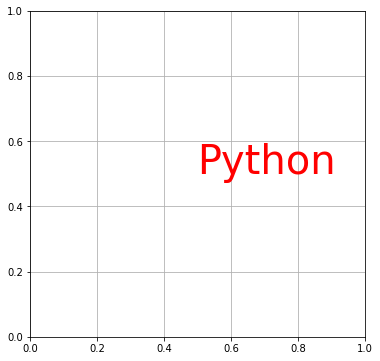
color でテキストの色を指定できます。
# In[4]

del fig.gca().texts[0]

# 座標(0.5,0.5)にテキストを表示する
# テキストの色を赤にする
ax.text(0.5, 0.5, "Python", size=40, color="red")

fig
fontfamily でテキストのフォントの種類を設定できます。
# In[5]

del fig.gca().texts[0]

# (0.4,0.4)にテキストを表示する
# フォントに"Impact"を指定
ax.text(0.4, 0.4, "Python", fontsize=50, fontfamily="Impact")

fig
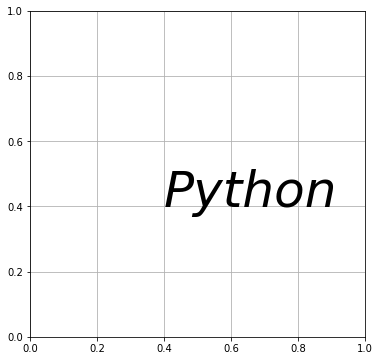
fontstyle でフォントのスタイルを指定できます。たとえば、テキストを斜体にしたいときには、fontstyle に “italic” を指定します。
# In[6]

del fig.gca().texts[0]

# 座標(0.4,0.4)にテキストを表示する
# 文字を斜体にする
ax.text(0.4, 0.4, "Python", fontsize=50, fontstyle="italic")

fig
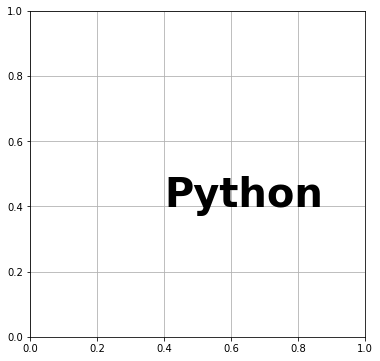
fontweight で文字の太さを変えられます。数値またはキーワードで指定します。
# In[7]

del fig.gca().texts[0]

# 座標(0.4,0.4)にテキストを表示する
# テキストを太字にする
ax.text(0.4, 0.4, "Python", fontsize=40, fontweight="bold")

#fig.savefig("text_07", bbox_inches="tight")

fig
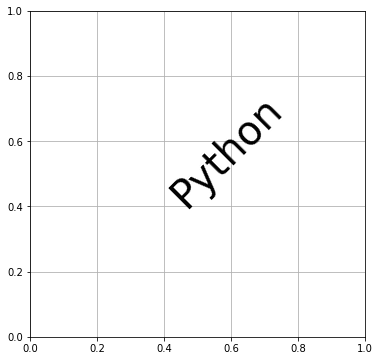
rotation でテキスト全体を回転できます。
# In[8]

del fig.gca().texts[0]

# 座標(0.4,0.4)にテキストを表示する
# 文字を反時計周りに45度回転する
ax.text(0.4, 0.4, "Python", fontsize=40, rotation=45)

fig
Axes.text() メソッドは、デフォルトではデータに関連付けた座標で位置を指定するようになっています。つまり、x 軸と y 軸の目盛に合わせて座標を指定します。インスタンス引数を敢えて明示的に記述するなら、transform=Axes.transData となっています。transform には他に Axes.transAxes と Figure.transFigure を指定できます。その意味を理解するために、次のコードを実行してください。
# In[9]

# FigureとAxes
fig, ax = plt.subplots(figsize=(6, 6), facecolor="lightgray")

# x軸とy軸の範囲を0~2に設定
ax.set(xlim=(0, 2), ylim=(0, 2))
ax.grid()

# データに関連付けてテキストを表示
ax.text(0.4, 0.4, "Data", fontsize=18)

# Axesに関連付けてテキストを表示
ax.text(0.4, 0.4, "Axes", fontsize=18, transform=ax.transAxes)

# Figureに関連付けてテキストを表示
ax.text(0.4, 0.4, "Figure", color="grey", fontsize=18, transform=fig.transFigure)

plt.show()
![[Matplotlib]transform(Axesに関連付けてテキストを表示)](https://python.atelierkobato.com/wp-content/uploads/matplotlib_transform.png)
位置関係がわかりやすいように、Figure は灰色で塗り潰してあります。デフォルトの状態で表示させた “Data” は (x, y) = (0.4, 0.4) の位置にあります。transform に Axes.transAxes を渡して表示させた “Axes” は図の白い部分の縦と横の大きさに対する比率で (0.4, 0.4) の位置にあります。”Figure” は “Axes” と少しだけずれた位置にあります。transform に Figure.transFigure を渡した場合、Figure (灰色部分を含めた領域) に対する比率で位置を指定することになるからです。
テキスト設定の詳細については記事末の matplotlib.text.Textクラスのインスタンス引数 を参照してください。
フォント辞書による書式設定
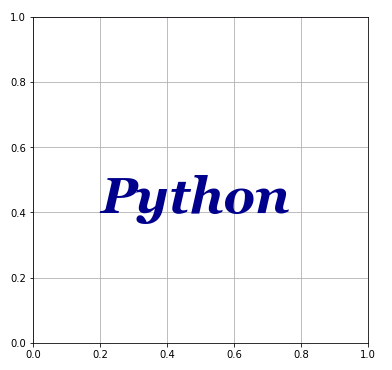
フォント辞書を作成して Axes.text() の引数に渡すこともできます。
# MATPLOTLIB_TEXT_FONT_DIC

# In[1]

import matplotlib.pyplot as plt

# Figureを設定
fig = plt.figure(figsize =(6, 6))

# Axesを追加
ax = fig.add_subplot(111)

# 目盛線を描画
ax.grid()

# フォント辞書の作成
fdic = {
    "family" : "Georgia",
    "style" : "italic",
    "size" : 50,
    "color" : "darkblue",
    "weight" : "heavy"
}

# Axesにテキストを追加
ax.text(0.2, 0.4, "Python", fontdict=fdic)
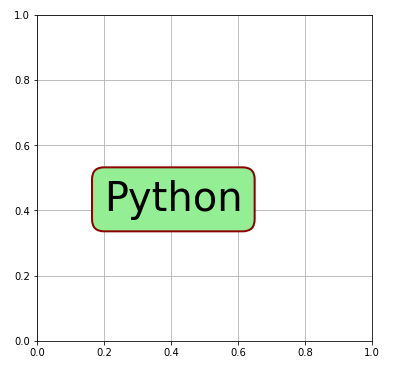
bbox
Axes.text() の引数に bbox を渡すこともできます。bbox はテキストを囲む図形のスタイルを設定する辞書です。辞書の中で “boxstyle” が指定されると matplotlib.patches.FancyBboxPatchクラスのインスタンス(特殊な形をした図形)が呼び出されることになります。”boxstyle” が指定されない場合は、matplotlib.patches.Rectangleクラスのインスタンス(普通の長方形)が作られます。
# MATPLOTLIB_TEXT_BBOX

# In[1]

import matplotlib.pyplot as plt

# Figureを設定
fig = plt.figure(figsize =(6, 6))

# Axesを追加
ax = fig.add_subplot(111)

# 目盛線を描画
ax.grid()

# bboxの作成
boxdic = {
    "facecolor" : "lightgreen",
    "edgecolor" : "darkred",
    "boxstyle" : "Round",
    "linewidth" : 2
}

# Axesにテキストを追加
ax.text(0.2, 0.4, "Python", size=40, bbox=boxdic)
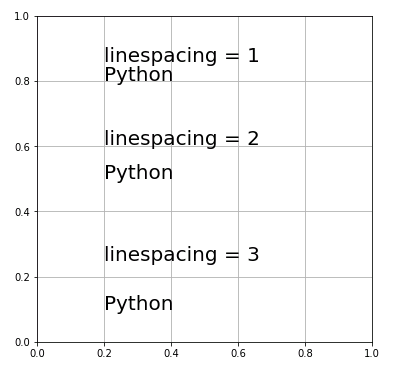
行間隔の設定
Axes.text() の引数に linespacing を渡して改行したときの行間隔(スペース)を設定することができます。
# MATPLOTLIB_TEXT_LINESPACING

# In[1]

# Matplotlibをインポート
import matplotlib.pyplot as plt

# Figureを設定
fig = plt.figure(figsize =(6, 6))

# Axesを追加
ax = fig.add_subplot(111)

# 目盛線を描画
ax.grid()

# 行間隔を変えてテキストを表示
ax.text(0.2, 0.8, "linespacing=1\nPython", size=20, linespacing=1)
ax.text(0.2, 0.5, "linespacing=2\nPython", size=20, linespacing=2)
ax.text(0.2, 0.1, "linespacing=3\nPython", size=20, linespacing=3)
matplotlib.text.Textクラスのインスタンス引数
| 引数 | 記述方法 |
|---|---|
| alpha | float |
| backgroundcolor | color |
| bbox | patches.FancyBboxPatchオブジェクトのプロパティ辞書 |
| color | color |
| fontfamily | FONTNAME |
| fontproperties | font_manager.FontProperties |
| fontsize | {数値, “xx-small”, “x-small”, “small”, “medium”, “large”, “x-large”, “xx-large”} |
| fontstretch | {0-1000の数値, “ultra-condensed”, “extra-condensed”, “condensed”, “semi-condensed”, “normal”, “semi-expanded”, “expanded”, “extra-expanded”, “ultra-expanded”} |
| fontstyle | {“normal”, “italic”, “oblique”} |
| fontweight | {0-1000の数値, “ultralight”, “light”, “normal”, “regular”, “book”, “medium”, “roman”, “semibold”, “demibold”, “demi”, “bold”, “heavy”, “extra bold”, “black”} |
| horizontalalignment | {“center”, “right”, “left”} |
| in_layout | bool |
| linespacing | float (fontsizeに対する倍率) |
| position | (float, float) |
| rotation | {度数単位の角度, “vertical”, “horizontal”} |
| rotation_mode | {None, “default”, “anchor”} |
| url | str |
| verticalalignment | {“center”, “top”, “bottom”, “baseline”, “center_baseline”} |
コメント
下記は誤植と思われますので、ご確認ください。
In[9]プログラムで、”Figure”, fontsize=18 → “Figure, color=”grey”, fontsize=18
その下の実行結果で、facecolor=”lightgrey” が反映されていない。
”Figure” の色を黒 → 灰色
「行間隔の設定」の説明文で、linspacing → linespacing
ありがとうございます。
図を差し替えておきました。m(_ _)m